Fig. 1. ECU module 21214-1411020-30.
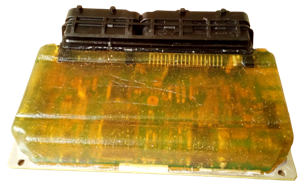
Fig. 2. ECU module, casing removed, circuit board encapsulated with epoxy resin.
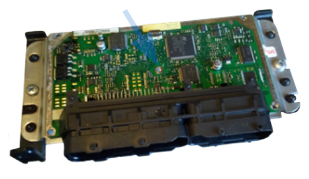
Fig. 3. ECU circuit board, rivet that fastens it to the lower casing half is in the center.
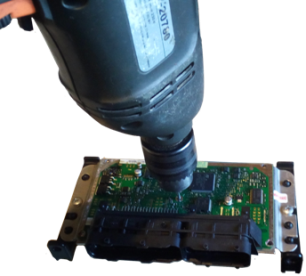
Fig. 4. Drilling out the rivet.
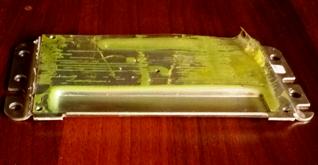
Fig. 5. Peeling out film. Later we will return it in place.
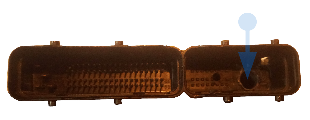
Fig. 6. Aperture for resin fill in.
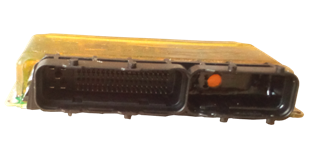
Fig. 7. Back lighted through cured resin aperture is clearly visible.
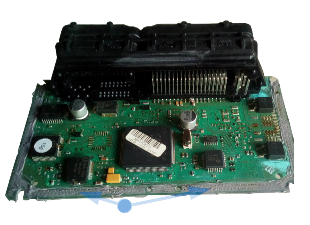
Fig. 8. Silicon RTV sealant is applied on circuit board edge.
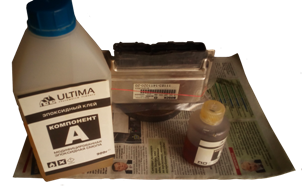
Fig. 9. All is ready to fill in resin.
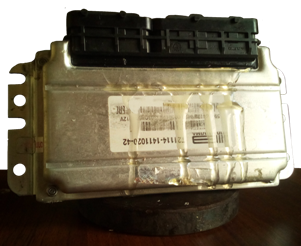
Fig. 10. Resin starts to leak between casing and connector.
|
Possibility of penetration of water into ECU is shortcoming of any injection car, especially off-road vehicle.
BOSH and ITELMA engine control modules that are used now (2020) in Lada Niva and Lada 4x4 cars are
extremely water
vulnerable. Several drops of water that get onto module's casing joints or into its connector may be sufficient to cause its failure.
Such situation may occur if windshield water drainage got clogged, or if water got into vehicle interior while overcoming deep puddle.
ECU is situated within the passenger compartment bottom left beside driver's feet in "classic" Lada Niva
(Lada 4x4) and bottom right relative to steering column beside front passenger's feet in Niva-Chevrolet. Each location is low in compartment,
beneath windshield and water of whatever origin can easily get there.
Leaving for a moment aside maintenance of Niva cars, much worse the situation is with Lada Kalina
passenger
car. ECU in Lada Kalina is situated directly below heater radiator and fails when said radiator leaks. As sooner or later heater
will definitely leak, ECU is necessarily scheduled for replacement, option is to sell the car before it happen. Owner of brand new
Lada Kalina,
if lucky, has approximately ten years to do it.
If moisture gets inside control module in very little quantities there may be time span when
module could be spared. If from time to time check engine light goes on and diagnostics show some irrelevant errors, it may indicate
that ECU is getting wet inside. For that matter in general multiple incomprehensible diagnostic errors may indicate ECU malfunction.
Known solutions to the ECU water damage problem in Internet
1. Relocate ECU to higher and safe in leak terms location. The solution is in principle not bad, but there is not much room behind
dashboard top. Besides, ECU harness extension is needed.
2. Wrapping ECU in plastic bags is definitely bad idea. It is practically impossible to seal bags properly, and there is possibility of
condensing of moisture inside.
Waterproof ECU modules of 1990s
In distant 1990s of the last century due to efforts of persons who had been buying cars abroad with intention to resell in this country
and other auto dealers a vast quantity of (heavily) used imported cars emerged, in particular of American make. That vehicles were for
most part with injection systems already and accordingly equipped with ECUs.
What was about ECUs in question? The thing to note was that that were usually located under the bonnet,
subject to dust and water from the road. Their circuit plates with electronic components were sealed with some sort of resin. Resin filling
kept moisture away and thus prevented engine control modules failure.
Attempt to google or "yandex" for that matter such controllers failed, it seems they never existed. Now obviously the whole world
drive cars with water permeable ECUs.
Our experiment
We decided to set up an experiment described hereafter on ECU water protection possibility by
means of coating ECU's circuit board with epoxy resin. Said resin is used in radio engineering industry exactly for such purpose.
We tried to fill with the resin all empty space inside controller module casing, not only sealing electronic components on the circuit board
but leaving no empty cavities inside casing for the water not to have space to accumulate as well.
The experiment was attempted on Lada Kalina passenger car, which brains got caught in coolant leaking
from faulty heater radiator in the April 2020. To mend this issue a new module was acquired and then filled with epoxy resin as
described below prior to replacement.
The experiment in not completed yet, as we had not deliberately pour water on operational ECU after
it was installed in the car. As of today, September 2020, control module still works and the following could be concluded:
1. In course of filling out ECU with resin no damage to electronic components occurred.
2. During hot summer period no deformations of circuit board had led to ECU's failure.
We are waiting for the winter to come, when low temperatures also may lead to certain
breakdowns of the
circuit board. We pay attention on those matters as they were pointed at by experts with whom we had consulted beforehand.
The Kalina car is in use practically every day.
We plan to post what happen next on this page.
How the ECU was filled with epoxy resin
We are not responsible whatsoever for any damage to ECU that might happen in course of
actions described below. This article is written solely for advertising informational purpose.
How resin coated ECU looks in the end (casing removed) is depicted on fig. 2.
1. Remove upper casing half (unscrew four screws or nuts in casing corners). Circuit board view
with rivet in center shown on fig. 3.
2. Drill out the center rivet that holds circuit board to the lower casing (fig. 4). Separate
lower casing from the board.
3. Peel out dielectric film from lower part of the casing (fig. 5).
4. Apply a thin layer of some grease to the insides of both parts of casing to prevent adhesion of
the cured resin and so it will be possible to disassemble ECU later if necessary.
5. Drill in not used section of ECUs connector aperture approximately 10 mm diameter for resin
fill (fig 6).
Smaller aperture visible on fig. 6 was drilled to let air out and is not needed. Back lit aperture already filled with resin (sealed) is
clearly visible after filling is completed and resin cured (fig. 7).
6. Apply silicon RTV sealant to both upside and downside circuit board edge, to ensure no
liquid resin leak through casing junction in course of resin fill process (fig 8).
7. Assemble ECU unit - to be on the safe side return dielectric film between lower casing
and circuit board, insert latter between casing halves and screw in four threaded connections at ECUs corners. Check seal quality
of the seam.
8. Position assembled ECU vertically (connector top), insert funnel to aperture size and
pour mixed according to providers instruction components of epoxy resin into drilled aperture, till it starts to leak from
the gap between ECUs casing and its connector (fig. 10). While resin cures it is possible that massive heat release occurs due to
exothermic reaction. Probably that is not unsafe, nevertheless at serious temperature rise of controller casing that occurred we started to
cool it under cold water stream.
What is not done
To fix the problem of ECU water safety thoroughly it is necessary to seal its connector.
Nevertheless providing watertightness to the circuit board as described above main part of the problem may be solved.
After ECU change it is necessary to reprogram built-in car anti-theft system
if it was enabled.
|